New Project, New Group….. Kind of…… PANIC!!!!!!!!!

Project 2 – Elimination

So yesterday we we’re introduced to the next project of the Understanding Animation module.

In this project we have to create another 30 second stop motion animation, where 2 characters have to/ try to eliminate a 3rd character. In the new group (which consists of Max and Matt) we’ve come up with a few ideas which we are currently brainstorming at the moment, we’re kind of swapping between wacky and/or serious ideas but I feel as if we’ll lean towards wacky.

town called panic

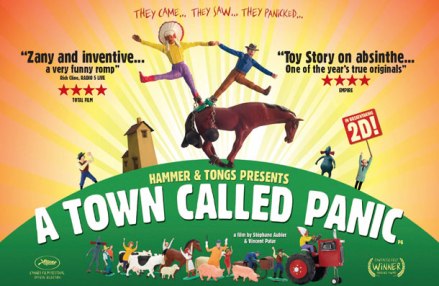
“The zaniness of style matches the zaniness of story”, the words that Andy described the film “A Town Called Panic” really really really fun to watch. I enjoyed watching every second of this film mainly because of it’s wackiness, which is very relatable to myself as a person but also it’s simplicity makes more enjoyable to watch. Plus it’s also relatable to the new project as well some of the ideas that we have.

Last but not least, here’s the final edited version of our first project….. FINALLY!!! After compiling all the scenes into the correct sequence, we decided to add sound to the video as well as some fancy effects. Doing this was pretty straight forward as adding sound was just a simple drag and drop from the folder then just erase tool and the volume adjuster option until you’re happy with the result, as for the effect we decided to add some lens flares for the transition to the drawings with the scene, to act as the process of capturing. This came out really well and I think it’s one of the strongest attribute of our video.

And that’s a Wrap

So yesterday after 3 weeks of planning and capturing, we’ve FINALLY finished shooting for our Pixilation animation. The process as a whole was very fun and quite stressful at sometimes.

What I mean by this is that our planning wasn’t the strongest element of our group because we couldn’t make decisions on how we approach with the story of the animation. One moment we wanted include more and more characters in, but we couldn’t because of our budget. And another time some of our group members wanted to change elements of the story, some of which we’re but some we’re also bad, which delayed time and concentration.

But the whole process wasn’t all doom and gloom because we as group have managed to work together to complete the task even when we barely knew one another, so I am pretty proud of myself, Max and Alo.

But if we we’re to do this project again, we will need to definitely need to improve on both our planning and communication skills so we won’t run into the same problems as last time. (Drawings by Max)

DNG 1 DNG 3 DNG 4 0286 0243 0146

As for today we “somewhat” started editing the sequence. We had already process the images to the correct image size and resolution that was required by the brief in Photoshop using ‘Batch’. But during a visit around town I had lost my Memory Stick which was updated by all the work that we did yesterday, which meant if we lost it then we had to rely on hopefully getting the files back off the 600D we used and whack them on the computer, which could off been a huge time consumption, but lucky for us I remembered where I had left which was the library.

So after nearly suffering from a heart attack, we imported the image into Premier Pro and using the razor tool dissecting the timeline so that all the frames we’re in the correct order, as well as adding the new drawings of the characters into the timeline.

Starting tomorrow we will most definitely finished the editing by hopefully adding audio and some fancy effects to the video.

Frames frames FRAMES!!!

So today we got the critic feedback from Jools and the rest of the class about what we have done so far on the project.

The feedback was mostly positive, Jools and the rest of the class really liked our idea and plans for what we have/are going to do with our Pixilation

Though we had some gray areas like the jump through the roof idea wasn’t a strong idea, and the back and forth discussion about whether or not to include a certain shot in the final Product.

Despite this though I enjoyed the feedback and it really helped with the next stages of our production.

Filming

After lesson we got back on track with filming, and we managed to get the capture of the first victim and the end scene finished but we were still 173 frames shy away from finishing filming.

So after discussing what we should do next we decided to add another character to the project which Maria was happy to help with.

We also decided that we would animate some of the drawing that will act as the captured victims, this will hopefully take up a couple of frames as well.

Getting started with Childish Puns

During the last days of this week I managed to get a lot of things done. Firstly we finally managed to make a start on capturing for our project on Thursday. It was really really fun to make a start after all the planning and confusing of trying to make sure it worked.

Although we had some fall outs during the beginning of the shoot, trying to get the camera to work properly, but in the end we all made up and just got on with the shoot. It really gave me an insight in to working the industry with a group that you may or may not agree/disagree with, which is something that I need to work on a little.

In the end we managed to get the beginning of the animation completed with 2 different scenarios for the first capture of the notebook. My idea, where the main character will go under a set of stairs and teleport up to where the first victim will be. And Alo’s idea where the main character will jump through the roof where the victim will be. They are two very good ideas that we can’t choose between, so we decided to shoot both and then choose which one is the better, whilst taking the “Budget” we have into consideration.

IMG_6827      IMG_6938      IMG_6876

Drawing

And Secondly I learnt how to apply volume to my drawings during our Drawing sessions with Shaun and Andy. We we’re all assigned a mug each and was asked to draw that mug and give it volume. This a very difficult process for me because I had no idea how to give a drawing volume and plus I was using a HB pencil, which isn’t the best of pencils to draw with. So after many flat drawings Shaun gave a variety of pencils and asked me to draw a variety of heavy and light lines on a random page and see if I could get use to drawing between the two. After doing this I tried again with drawing the mug, but this time using both heavy and light lines, which came out as a success which yo can see down below.

After this we messed around with the volume technique and drew our own little mug characters. I created a character called Mr Mug, who is going for a Mug shot after being arrested for Mugging. I am not ashamed with these puns and despite what you might say I don’t care, I find it funny.

IMG_0847[1] IMG_0848[1] IMG_0849[1]

IMG_0850[1] IMG_0851[1]

Test, Test and even more Tests

So today we began doing some tests in preparation for when we hopefully start capturing our story idea for the first project.

The testing we commenced today was practicing the ‘Stop Trick’ technique and also creating a .GIF of the frames that we’ve captured in Premier Pro.

The capturing process of the scene was both fun and irritating at the same time, because we wasn’t able to borrow the same camera’s that we were using last week when practice with Andy, I don’t remember what model we were using last week but for our testing today we used a Canon 600D. It was a lot trickier to get use to because it was a lot fancier thn the previous one, but we eventually got the hang of it.

I also got a quick self portrait of myself from the talented Max Jacobs (Max’s Blog) who’s part of my group and is also featured in the test .GIF that we made. The sketch looks awesome and I really like it, but I think that the pose that the sketch has could be different like the character has a surprise or upset look, with both hands in the air saying “Help Me”, but this was just a simple test so it didn’t really matter, plus the sketch is pretty EPIC (Thanks Max).

IMG_0841[1]                         Stop motion

After capturing the scene on the 600D we took the pictures to Premier Pro where we could make the compile the images into the .GIF you’re seeing in this Blog. To me this process looked pretty confusing, so it was a good thing Max had some form of idea of what to do. When it was made we noticed that the .gif had some blur to it (maybe a blur effect was accidentally added), which it probably he reason why the .gif looks choppy and blurry. I think when we actually come to editing for the final animation in Premier, I’ll have a look at some tutorials to prevent this from happening.

Create a free website or blog at WordPress.com.

Up ↑